coreSTORE - Inventory: Adding Attributes and Values in coreSTORE
In this document, we will explain the concept of attributes in coreSTORE. Attributes are used as additional selections for your inventory, allowing you to denote variations such as color and size for matrix products. For FFL dealers, attributes commonly include the caliber of firearms. This guide will help you understand and set up attributes to enhance the categorization and management of your inventory items, ensuring that all variations are accurately represented.
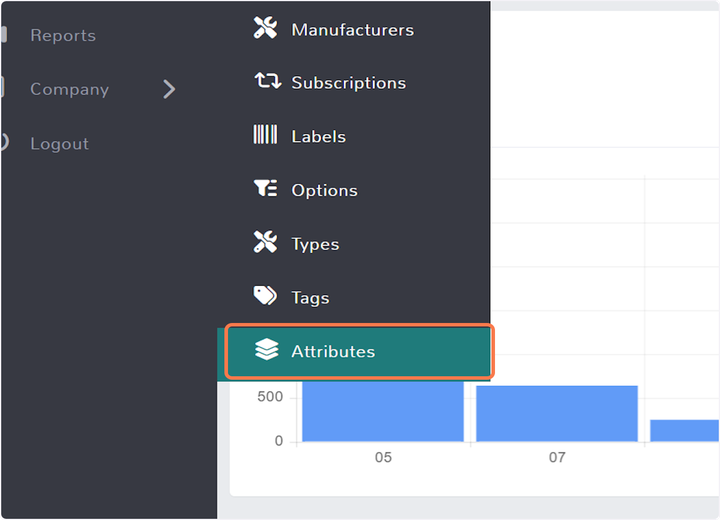
- Navigate to Inventory > Attributes
Find Inventory Attributes:
Head to "Inventory" on the main menu or navigation bar. Then, look for a sub-menu or option titled "Attributes". This will take you to the section where you can manage additional details associated with your inventory attributes within coreSTORE.

- Manage Attributes Screen
Your Attribute Hub: Manage It All
Head over to "Manage Attributes" to access your central location for all product attribute management within coreSTORE. This screen lets you:
- Browse Existing Attributes: Get a clear view of all the attributes you've previously created in coreSTORE.
- Edit with Ease: Modify existing attribute details to ensure they accurately reflect your product information needs.
- Delete Unneeded Attributes: Remove any outdated or irrelevant attributes to keep your system organized.
- Manage Values (Optional): Depending on your system's functionality, you might be able to view and manage existing values associated with each attribute.
This is your one-stop shop for keeping your product attribute data organized and up-to-date within coreSTORE.

- Add Attribute
Add Custom Inventory Attribute:
In Inventory > Attributes, click "Add Attribute" to create a new custom field for your inventory items. This lets you capture specific information beyond the core details typically included.

- Attribute Name
Name Your Custom Attribute (e.g., Color):
When adding a new attribute in Inventory > Attributes (top right corner "Add Attribute"), enter a clear and descriptive name in the "Attribute Name" field. In the example, "Color" would be a perfect choice for the new custom field we are creating. This name will help you understand the purpose of the attribute when managing your inventory details.

- Use for Variations
Use for Variations (Optional):
When creating a new attribute (Inventory > Attributes, "Add Attribute"), you might see a setting titled "Use for Variation". This option is relevant if you use matrix items in coreSTORE. Selecting it allows you to specify this attribute as a variable, meaning you can create different variations of an item based on this attribute (e.g., "Color"). This can be useful for managing products with multiple color options.

- Channels
"Channels" Beta: Attributes on Your Website (Optional)
Heads up for coreSTORE users! You might see a "Channels" beta feature within Inventory > Attributes. This feature is currently under development and might not be available in all versions.
What it does:
- Connects Attributes to Websites: If you use coreSTORE with an integrated website platform (like BigCommerce in this example), "Channels" allows you to potentially transmit your custom attributes as options and filters on your website.
- Enhanced Product Display: By linking attributes to your website, customers might be able to filter and browse products based on the details you've defined in coreSTORE (e.g., filtering by color).
Important Note:
As a beta feature, "Channels" is still being tested and might have limitations. Consult your coreSTORE documentation or support team for details on its current functionality and compatibility with your specific website platform.

- Click on OK
Click Okay to save your newly created attribute..

- Click on Manage Values
Define Attribute Options (e.g., Color):
After creating a new attribute (Inventory > Attributes, "Add Attribute"), you'll likely need to define the specific options or values users can choose from when assigning this attribute to inventory items. Here's how:
- "Manage Values" Option: Look for a button or option titled "Manage Values". Clicking this will allow you to define the various choices for your new attribute.
- Adding Color Options (Example): In your example of a "Color" attribute, you could add specific color names (red, blue, green) as the value options. This lets users easily select the appropriate color when managing their inventory within coreSTORE.
By defining clear value options, you ensure consistency and streamlined data entry for your custom attributes.

- Type "Green"
Adding "Green" as a Color Option (Example):
After creating a new "Color" attribute (Inventory > Attributes, "Add Attribute"), navigate to "Manage Values" (or similar option) to define the available color choices. Here, you've added "Green" as a new option. This allows users to select "Green" when assigning the "Color" attribute to specific inventory items within coreSTORE.

- Click on OK
Click Okay to save your new value.

- Click on Save
Click on save to save all changes.

Updated on: 06/26/2024
Thank you!
