coreSTORE - FFL: How to do a Paper 4473 in coreSTORE
Yes, you can still use a paper Form 4473, and this is perfectly acceptable. While I generally recommend consolidating all forms in one place for efficiency, if you need or prefer to use paper forms, here’s my advice:
- Create the POS transaction and Form 4473 ID as you would for any sale.
- Complete all information on the paper form.
- Invalidate the electronic Form 4473 in the Manage 4473 page, noting "Paper Form" in the comments.
- Use the Form 4473 ID on your paper form to facilitate tracking.
- Finally, scan and upload the completed paper Form 4473 to the disposition tab of the firearm in the Bound Book.
This process will help maintain accurate records while accommodating your preference for paper forms.
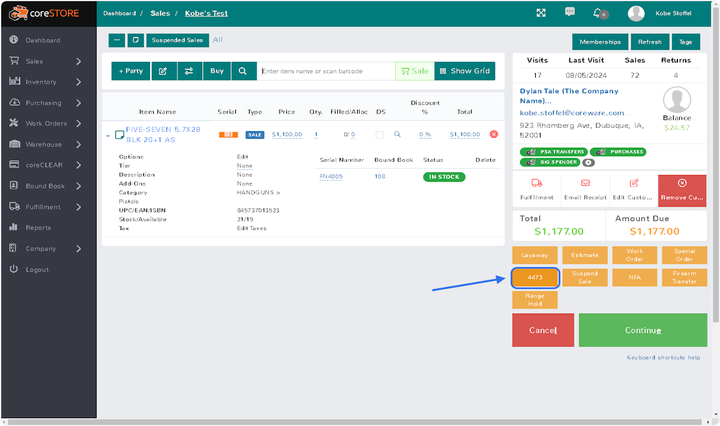
- First, ring up the firearm and the customer under Sales > New Sale.

- Next, suspend the sale using your "4473" Suspended Sale Type.

- Confirm this action by clicking "OK" in the dialog box.

- Now, grab the 4473 ID that is generated at the bottom of the receipt.

- Once copied, go into Bound Book > Manage 4473.

- Then, search for the 4473 ID and click on the 3-dot menu to the left of it. (The most recent 4473's will be at the top)

- Once the 3-dot menu is selected, click on the "Invalidate 4473" option.

- Then, type in a reason as too we we are invaliding this electronic 4473 and click "OK".

- Once invalidated, that E4473 will change to the color of red indicating that it has been invalidated.

- After the Paper Form is completed and their background check comes back good, we can go to Sales > Suspended Sales.

- At the top-left, click on the "Type" field and select the Suspended Sale Type that you put the customers sale under and click "Search". Otherwise, simply search for the customers name.

- Once you have found the suspended sale, simply click on the "Unsuspend" button.

- Finally, it will pull the sale back into the sales screen and from here we can click the big green "Continue" button at the bottom-right.

- Lastly, click on the "Complete Sale" button to finalize the sale.

- Then click "Yes" to the dialog box asking about submitting the sale without a 4473 filled in.

- Then click "OK" to the dialog box asking if we are sure we want to finalize the transaction.

- To fill in the 4473 number manually and upload and attach the Paper 4473 to the Disposition, go to Bound Book > Dashboard.

- Find your firearm and click "Edit" next to that record.

- Then, go to the "Disposition Information" tab at the top.

- In here, you can fill in the "NICS Verification #" and you can upload the Paper 4473 using the buttons below.
Please Note that you can only upload 5 things per record.

Updated on: 09/17/2024
Thank you!
