
coreILLA - Social Planner - Add Watermark to every image you post on Social Media
A watermark is a visible, often translucent, design or text superimposed onto a digital image or document.
Watermarking posts on social media serves several purposes, and individuals or businesses may have different reasons for using watermarks. Here are some common reasons:
- Ownership and Copyright Protection: Watermarks can be used to assert ownership and protect the copyright of the content. By including a watermark with a username, logo, or other identifying information, it becomes more difficult for others to claim the content as their own.
- Brand Recognition: For businesses and content creators, watermarks can serve as a form of branding. Placing a logo or a brand name on images helps in building brand recognition. This can be particularly important for marketing and establishing a consistent online presence.
- Deterrence Against Unauthorised Use: Watermarks act as a deterrent against unauthorised use of images. Potential infringers may be less likely to use or share content that is clearly marked with someone else's branding or identification.
- Professionalism: Watermarks can add a level of professionalism to the content. This is especially important for photographers, artists, and other creatives who want to showcase their work in a polished manner.
- Promotion and Marketing: Watermarks can be used strategically for promotional purposes. For example, a watermark might include a website URL, social media handle, or a hashtag related to a campaign, directing viewers to the creator's online presence or a specific promotion.
- Personalisation and Artistic Expression:Some individuals may use watermarks as a means of personalization and artistic expression. The design and placement of can be a creative element that enhances the overall visual appeal of the content.
# Coreware
- Click on Marketing

- Click on Social Media Planner

- Click on New Post

- Click on Create New Post

- Click on Select a social account

- Check on

# [How to create Review Automation in Social Planner?
](https://app.coreilla.com/v2/location/cm6xLgMXhj0wxOAvux9X/launchpad)
- Type "TEST"

- Click on Post

- Click on Send Post for Approval…

- Click on Tuesday 23 Jul 2024

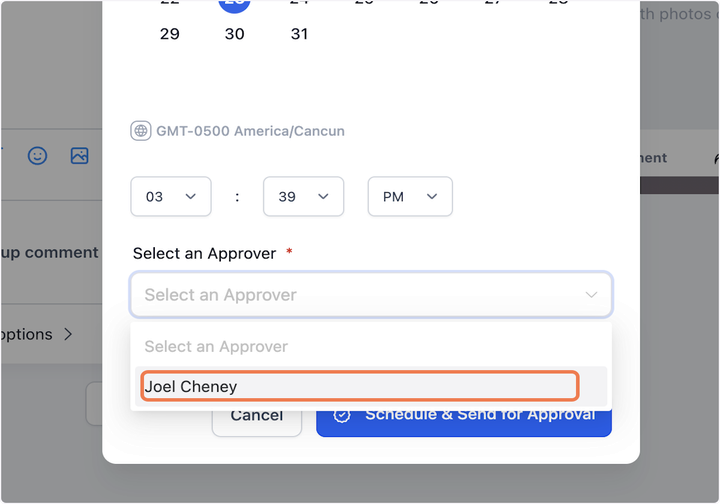
- Select 39

- After logging in to your coreILLA account, Click on Marketing.

- Click on Select an Approver…
- Click on July 2024…

- Click on Schedule & Send for Approval

- Click on Social Media Planner

- Click on settings of Social Planner

- In different tabs, go to the tab of Watermark.

- There is button of Add Watermark, click that.

- Over here add all the necessary details required for creating your watermark and save your work.
- User can add the name of watermark
- User can add the alignment of watermark - Top, bottom, right, left, centre
- Opacity can be added to the watermark.
- User can scale - resize the watermark image.
- There is an option of auto padding - adding more space around the logo.
Updated on: 09/17/2024
Thank you!