
coreFORCE - Products - Adding and Editing Products
The Products Maintenance is where the bulk of our item information will be housed, and as such this will be quite the lengthy article!
- Click on Products > Products

- Click on our selected product

- Click on Product Maintenance…
This layout will be universal amongst all of our products

Details Menu
- Detailed Description
Detailed Description is pertaining to any information on the item to be sold, this information will be viewable to the customer upon looking at a product's details

- Link Name
The link name is automatically generated based on the item's title

- Product Manufacturer
The Product Manufacturer field is what ties this specific item to a manufacturer's set of rules, be it dropshipping regulations or MAP Policies

- Cart Minimum
Cart Minimum automatically adds this amount of the item into the cart, if the customer tries to go below your minimum the item will be removed from the cart.

- Cart Maximum
Cart Maximum is exactly how it sounds, the value set here will limit sales in the cart to the specified quantity. For example, setting 5 for an ammunition item will limit sales to 5 boxes of ammunition.

- Model
Model is the item's either model number or special model name

- UPC
UPC Is the product code that is exclusive to a specific item

- Width
Width pertains to the item's width in inches

- Length
Length pertains to the item's length in inches

- Height
Height pertains to the item's height in inches

- Weight
Weight pertains to the items weight in pounds

- Check Ignore MAP
Ignore MAP is a tool we can utilize if an item is able to sell below MAP pricing

- Check Virtual Product
Virtual Product pertains to items that typically don't have physical inventory, like E-gift cards or vouchers

- Check Not Taxable
Not Taxable lets coreFORCE sell this product without collecting the applicable sales tax

- Check Non Inventory Item
This toggle ignores any entries in the inventory screen and allows sales even if quantity is 0

- Check Inactive
Inactive removes the product from both Admin view and customer view on the front end

Pricing Tab
- Navigate to Pricing

- Pricing
Pricing is where all of our price values are housed

- Select your chosen pricing structure
Why would this be applicable?
In the instance your web store has multiple potentially applicable pricing structures you can choose which set of rules to apply

- List Price
List Price is what customers will see as a strikethrough cost on the product tile if your selling price calculates below this list price

- Base Cost
Base Cost is a cost typically imported from distributors that will be used in your pricing structure calculations

- MAP
MAP Is imported via distributors or from coreSTORE and is crucial in ensuring all of the MAP policies function correctly

- Minimum Price
Minimum Price is the absolute minimum an item will sell for, this will override any calculations that fall below the set value

- Click on coreSTORE Prices
coreSTORE Prices gets imported from your coreSTORE Selling Price. This will force the product to sell at that exact price as long as your store keeps inventory in stock

Categories Tab
- Click on Categories

- Adding a Tag
We're able to add tags to any items on coreFORCE to either display in designated locations on the homepage or for backend filtering

- Select your desired tag
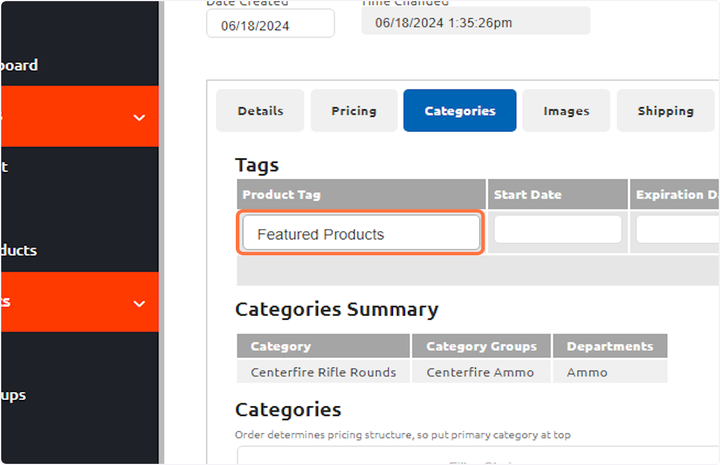
- Categories Summary
The Categories Summary is a quick readout of the taxonomy tree for the currently selected categories in an item

- Categories Choices
Categories can either be found by typing in information to filter or by dragging the desired choice from the left to the right

- Facets
Facets get automatically imported from our distributor feeds and help narrow search results and offer as much data as possible to the customer

Images Tab
- Click on Images

- Click on Primary Image
A primary image alternative from our Coreware Catalog can be uploaded for any item

- Remove Image
Remove Image is available to use if you would like to return to the Coreware catalog image or fully wipe an image and upload a new one

- Coreware Catalog Disclaimer
The green text line indicates the product is automatically pulling all available image data from our centralized catalog and an image does Not need to be uploaded

- Alternate Images
Alternate Images can be established to have more image possibilities once an item is clicked into by a customer

Shipping Tab
- Click on Shipping

- Shipping
The Shipping Tab displays any and all dropship locations from distributors and a toggle for an item wide block if a manufacturer contacts your dealer that this item cannot be dropshipped.

State Restrictions Tab
- Click on State Restrictions

- State Restrictions
State Restrictions will be automatically filled via the product imports from your chosen distributors. This primarily pertains to the states that have stricter gun restrictions such as Massachusetts/ California and if a customer from a restricted state attempts to purchase the item they will be stopped at checkout

Inventory Tab
- Click on Inventory

- Click on Inventory

- Inventory
The Inventory lines display information such as Distributor Availability, Distributor Pricing per Item and the ability to manually set inventory if one end of the feed, be it Coreware or the Distributor's end get's hung up as a temporary measure to allocate inventory and this value will get overridden on the next import

- Distributor Product Codes
Distributor Product Codes are the identifying code in the distributor's product feed and will ensure the correct product is being tied to the inventory values displayed.

Updated on: 11/20/2025
Thank you!